
- All
- Product Name
- Product Keyword
- Product Model
- Product Summary
- Product Description
- Multi Field Search
Views: 0 Author: Site Editor Publish Time: 2026-09-10 Origin: Site


Remodeling a bathroom frequently brings up a difficult choice. You want a visually stunning space, but you also face strict plumbing realities. The core dilemma lies in balancing these aesthetic goals with long-term maintenance limits. Mounting fixtures behind the drywall creates a fundamentally different environment than installing them directly on a vanity surface. It alters your entire construction timeline. Choosing the wrong setup can ruin your project schedule and complicate future repairs.
This article provides a technical, objective framework to help you decide. We will help you choose the right hardware based on your available space, budget, and specific installation constraints. You will learn how to align your fixture choices with your room architecture perfectly. Understanding these structural differences ensures a smoother renovation. You can then confidently navigate conversations with your plumber and tiler.
Spatial Impact: Wall mounted mixers free up vanity space and simplify cleaning, while deck mounted models are restricted to the basin edge or countertop.
Installation Complexity: Wall-mounted requires behind-the-wall rough-in valves, demanding early phase planning and higher upfront labor costs.
Maintenance Realities: Deck mounted faucets offer straightforward access for repairs; concealed fixtures require precise initial installation to mitigate behind-the-wall leak risks.
Basin Pairing: Spout reach and basin type (vessel vs. undermount) strictly dictate which mounting style will function without excessive splashing.
Comparing these two mounting styles requires looking beyond visual appeal. We must frame the comparison around strict structural requirements. Your choice dictates the sequence of construction trades during a renovation.
A concealed basin faucet relies on the concealed approach. This setup requires a rough-in valve securely mounted directly to your wall studs. Plumbers must complete this critical step before anyone applies waterproofing or lays a single tile. The structural integrity of the wall cavity becomes a primary focus. Tradespeople must align the internal components perfectly parallel to the finished wall surface.
The surface approach uses a much simpler logic. The mechanism relies on hot and cold supply lines routed straight through the vanity unit. Plumbers connect these flexible hoses externally underneath the counter. The main valve body sits above the surface. This keeps all critical connections easily accessible.
You must make your decision early. The project reaches a definitive pivot point before finalizing plumbing rough-ins. Switching your mind later creates a massive disruption. You would need to tear out finished drywall and destroy newly laid tile. It guarantees severe project delays and blown budgets.
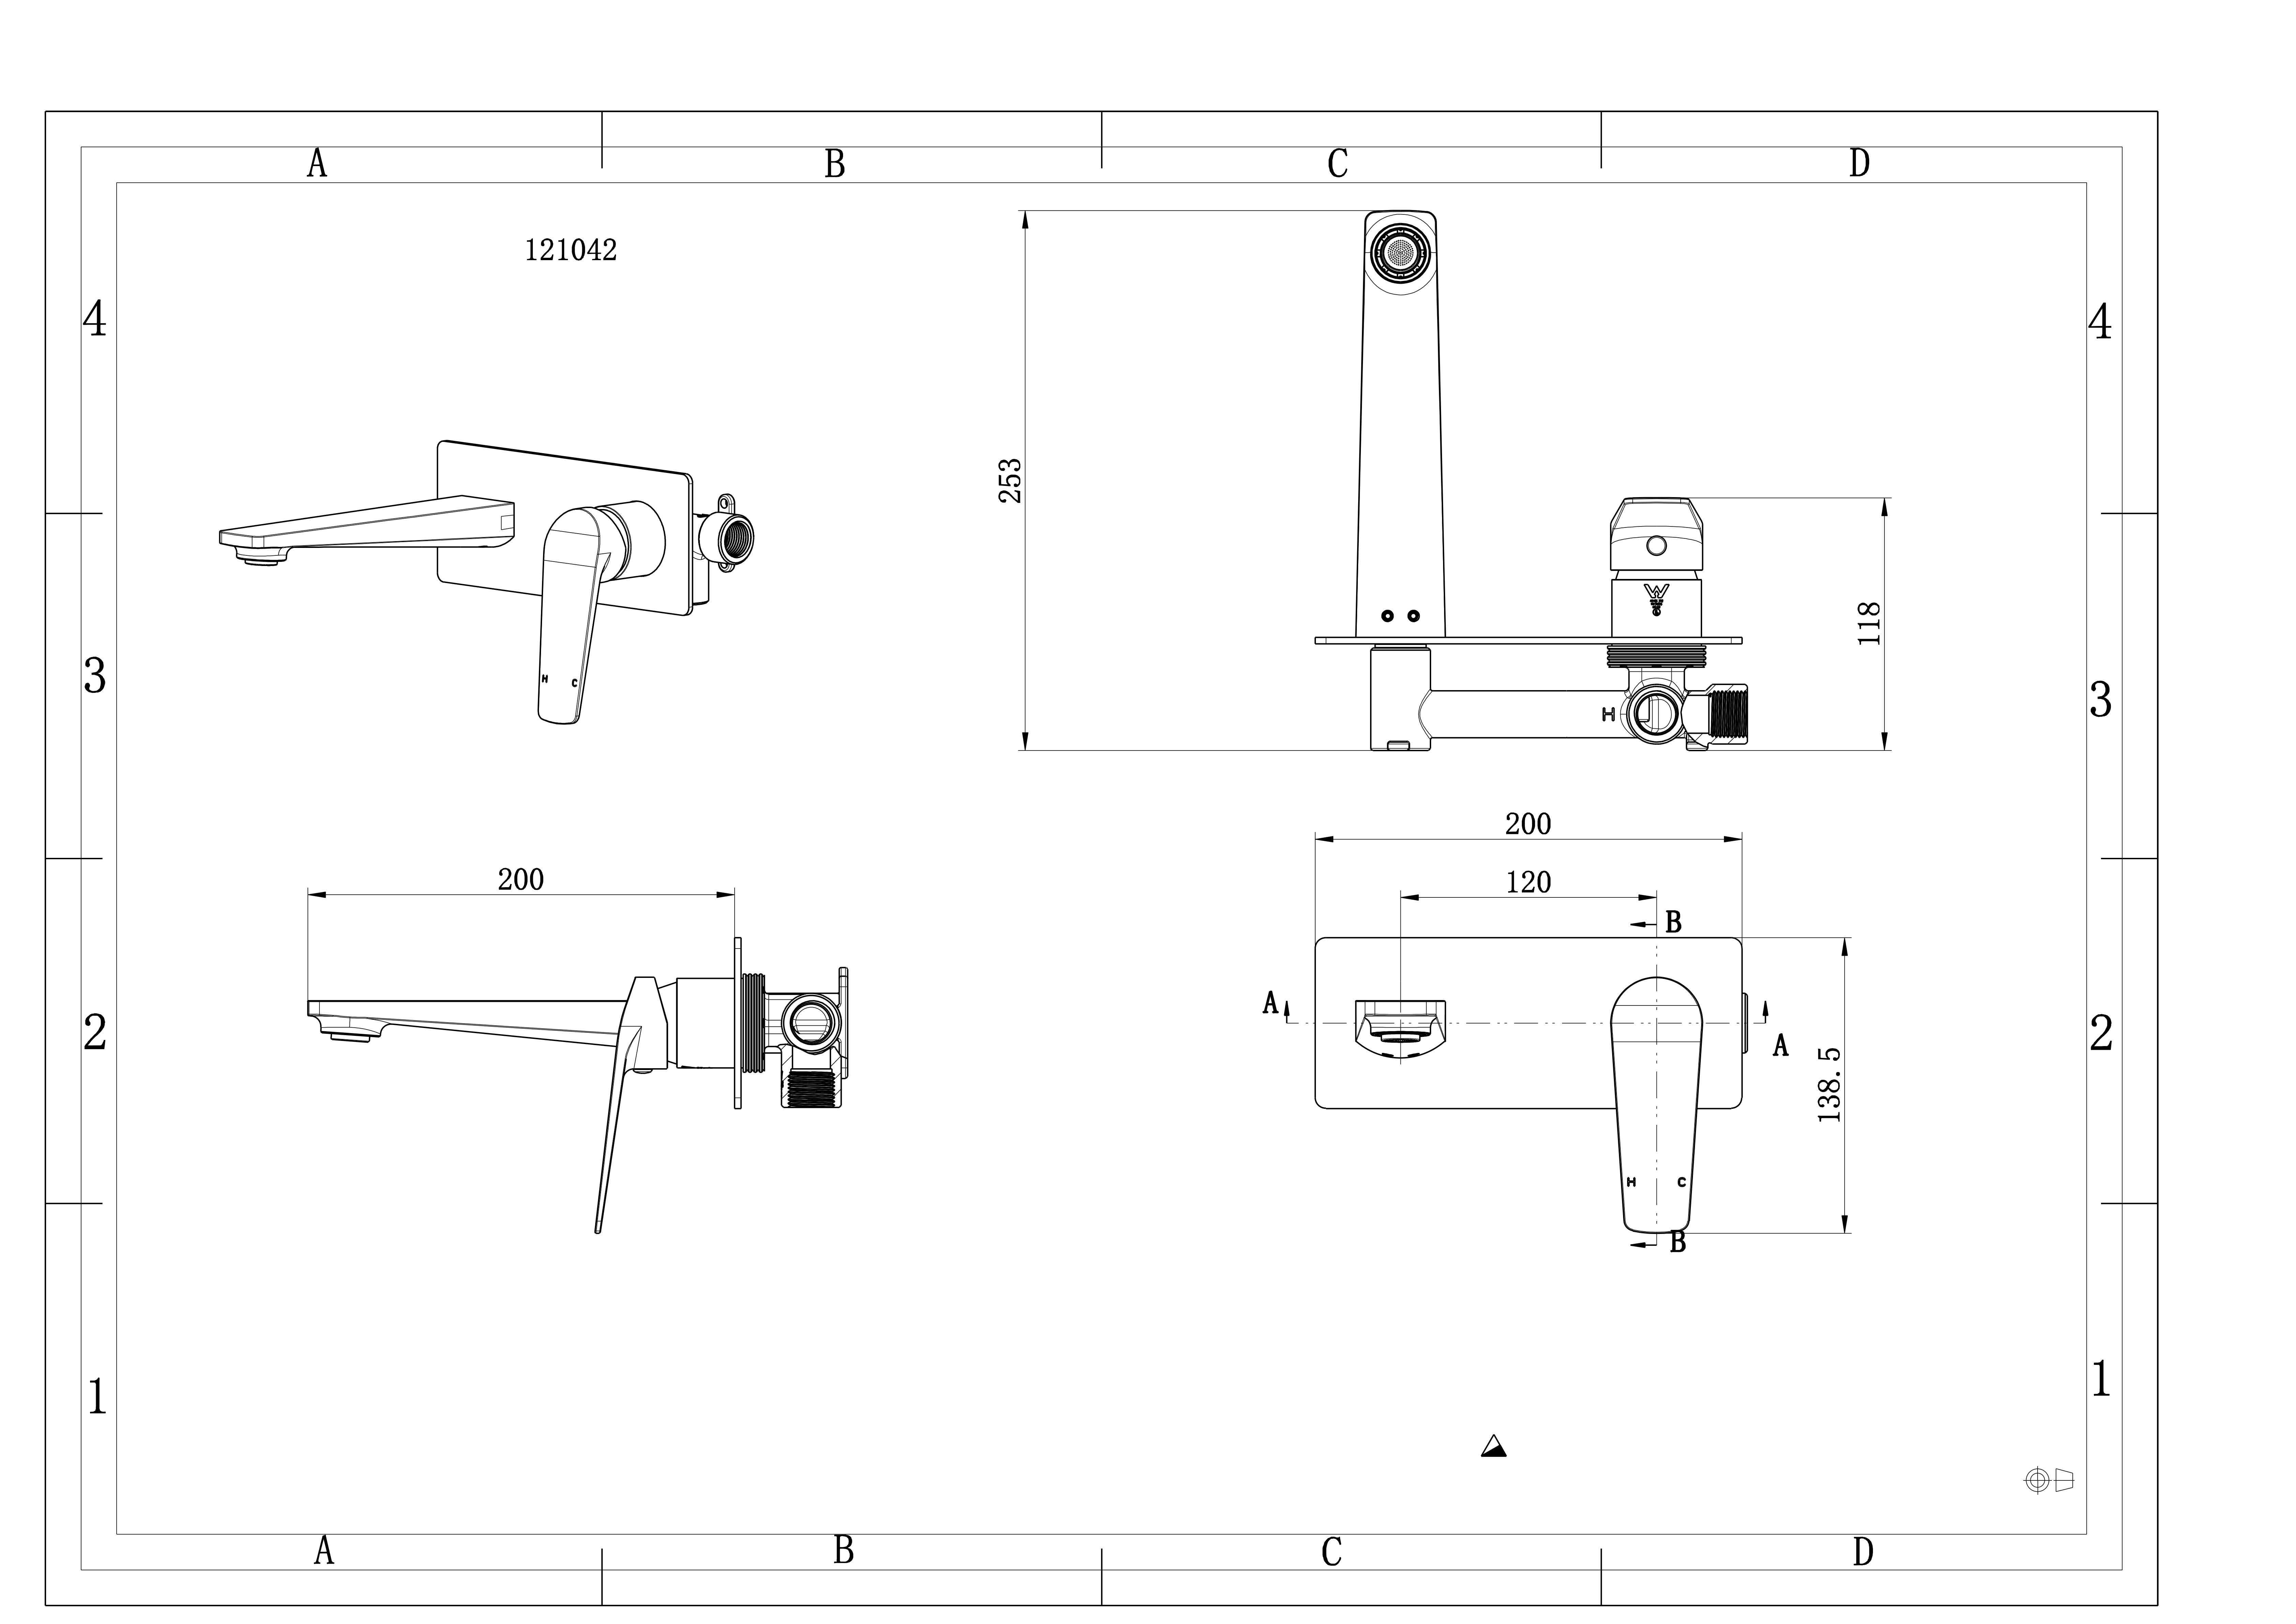
Choosing a wall mounted basin mixer transforms the functionality of your wash space. It offers distinct everyday benefits but introduces serious structural demands.
Functional advantages start with cleanliness. This setup creates zero water pooling at the base of the handle. It completely eliminates the frustrating calcium and grime buildup usually found around traditional fixtures. You also maximize your usable countertop footprint. Removing hardware from the surface leaves more room for daily essentials. Furthermore, this style serves as the ideal pairing for high-sided vessel sinks. It easily clears tall basin rims.
Implementation risks require careful attention. Structural prerequisites matter heavily here. You must have adequate wall cavity depth to house the heavy brass valve body. Standard stud walls usually suffice, but shallow partition walls cause major issues. Exterior walls in cold climates present severe freezing risks. You must insulate pipes meticulously to prevent bursting.
Cost and maintenance form the primary drawbacks. You will face higher labor costs. The plumber and tiler must collaborate closely. They have to align the spout and handle perfectly level across multiple layers of wall material. Maintenance carries its own risks. Repairing a faulty internal valve creates headaches. You might need to access plumbing through the finished wall. This happens if you cannot extract the seized cartridge directly from the front trim panel.
Confirm your wall cavity depth measures at least 70mm before purchasing hardware.
Install a pressure-testing cap on the rough-in valve to check for leaks before tiling.
Keep spare cartridges on hand. Sourcing older internal components becomes difficult over time.
Opting for a deck mounted basin mixer provides the safest, most predictable path for bathroom updates. It remains the global standard for residential plumbing.
Functional advantages revolve around standardization. You get the broadest compatibility across standard vanity units and pre-drilled ceramic basins. Almost any off-the-shelf vanity accommodates this style. Accessibility stands out as a massive benefit. Supply lines, cartridges, and fittings remain easily accessible inside the vanity cabinet. Plumbers can perform future repairs or total replacements in minutes. Cost-efficiency shines brightly here. You experience significantly lower installation labor. It forms the ideal choice for rapid bathroom updates. You can upgrade your space without ever disturbing the existing tile.
However, implementation risks do exist. These fixtures remain highly susceptible to water pooling. Every time you turn off the water with wet hands, drips run down the handle. Scale and grime build up rapidly around the base plate. This mounting style also limits your countertop storage. The physical footprint eats into your usable space. This restriction feels particularly noticeable in powder rooms or compact bathroom layouts.
Over-tightening the base nut underneath the counter, which can crack ceramic sink decks.
Failing to use plumber's putty or a rubber gasket, leading to slow water seepage into the cabinet below.
Selecting a low-profile model for a deep bowl, forcing users to bend uncomfortably to wash their hands.
Making a final decision requires measuring both options against strict criteria. We must evaluate lifecycle labor, spatial constraints, and material safety.
We must compare the initial installation premium against long-term serviceability. Concealed fixtures demand a multi-stage installation process. The plumber visits during the rough-in phase to secure the valve. They return weeks later during the fit-off phase to attach the trim. This split workflow drives up initial labor rates significantly. Surface fixtures require only one visit. The plumber drops the unit into the pre-drilled hole and connects the lines.
Long-term replacement changes the equation further. Swapping a surface-mounted unit is a DIY-friendly task. You only need a basin wrench and basic skills. Upgrading a concealed model presents a major challenge. You usually must match the existing internal valve brand and specific model. If the manufacturer discontinues that valve line, you cannot simply swap the external trim. You must tear open the wall to install a new rough-in.
Evaluation Metric | Wall Mounted Setup | Deck Mounted Setup |
|---|---|---|
Upfront Labor Hours | High (Split over rough-in and fit-off phases) | Low (Completed in a single continuous session) |
DIY Replaceability | Very Low (Requires precise valve matching) | High (Standardized connections underneath) |
Risk of Hidden Leaks | Moderate (Leaks occur behind drywall/tile) | Low (Leaks drip visibly into the cabinet) |
Tile Coordination | Mandatory (Requires precise hole cutting) | None (Mounts strictly to the horizontal deck) |
Spatial planning determines how comfortably you interact with the water flow. You must calculate spout reach and height with extreme precision. A slight miscalculation ruins the user experience. The golden rule of thumb remains simple: The water stream must hit the drain perfectly.
If the stream hits the sloping side of the bowl, you get aggressive splashing. Wall-mounted spouts require meticulous mathematical calculations. You cannot measure from the raw timber stud. You must calculate the distance from the finished, tiled wall surface to the basin center. You have to account for the thickness of cement board, waterproofing membranes, thinset mortar, and the tile itself.
Spatial Configuration Chart | ||
Sink Type | Ideal Spout Reach Requirement | Clearance Height Strategy |
|---|---|---|
Standard Undermount | 150mm - 200mm from base | Maintain 100mm - 150mm above the rim |
Tall Vessel Sink | Requires extended reach (200mm+) | Must clear the 150mm+ high bowl walls |
Compact Powder Room | Short projection (100mm - 120mm) | Keep low profile to match small bowl depth |
Measure the total depth of the vanity cabinet.
Identify the exact center of the basin drain hole.
Calculate the thickness of the finished wall layers.
Select a spout length that bridges the gap from the finished wall to the drain center.
Selecting heavy-duty materials proves absolutely critical for concealed parts. You cannot compromise on quality when installing plumbing behind finished walls. A catastrophic wall leak destroys framing, insulation, and adjacent rooms. We strongly recommend specifying a solid brass or stainless steel basin tap. These materials resist internal corrosion and handle fluctuating water pressures effortlessly over decades.
Regulatory and safety compliance requires equal attention. You must ensure your chosen fixture holds recognized certifications. Verifying you have a certified WaterMark basin mixer (or a local equivalent like cUPC in North America) is non-negotiable. Building inspectors will fail your renovation if they spot uncertified rough-in valves. Furthermore, insurance companies routinely deny water damage claims if they trace the leak back to non-compliant plumbing hardware. Always check the physical stamp on the brass valve body before the plumber installs it.
Your final decision relies heavily on your project scope. Different renovation types favor different mounting approaches entirely.
Choose Wall-Mounted If:
You are executing a full gut-remodel where walls are already open down to the studs.
You are installing a tall, statement vessel sink that requires extreme height clearance.
You prioritize minimalist, high-end aesthetics over initial budget constraints.
You have a sufficient budget to cover specialized plumbing and precision tiling labor.
Choose Deck-Mounted If:
You are doing a fast cosmetic upgrade without altering the existing wall structure.
You already own a pre-drilled drop-in or under-mount ceramic sink.
You urgently want to minimize budget overruns and timeline delays.
You prioritize easy maintenance and DIY-friendly future repairs.
Your immediate next steps involve detailed physical measurements. Instruct your contractor to verify your wall stud cavity depth immediately. Do not buy any hardware until you finalize the specific sink bowl dimensions. Once you lock in the sink size, you can safely order your bathroom basin mixer with the correct spout projection.
Neither mounting option stands out as inherently superior in every situation. The right choice relies entirely on your project scope. Full remodels support concealed installations beautifully. Surface updates heavily favor traditional deck setups. The specific vanity and sink pairing you choose ultimately forces your hand regarding spout reach and height.
Take the time to assess your true maintenance tolerance. Determine if you prefer easily accessible valves or seamless countertop aesthetics. We strongly prompt you to consult with a licensed plumber early in the design phase. Bring the exact technical specifications of your chosen sink to this meeting before purchasing any final brassware.
A: Yes, but it requires opening the wall to reroute plumbing and patch/retile, plus replacing the vanity top to eliminate the old deck holes.
A: Not inherently. Splashing is caused by mismatched spout reach and basin depth, or excessive water pressure, not the mounting position.
A: Surface leaks and cartridge replacements can usually be done from the front by removing the handle. However, leaks in the rough-in valve itself require wall access.


