- All
- Product Name
- Product Keyword
- Product Model
- Product Summary
- Product Description
- Multi Field Search
Views: 0 Author: Site Editor Publish Time: 2025-07-02 Origin: Site


Building a modern bathroom vanity is not very hard. You can pick the size and shape you want. You also choose the materials and the finish. If you use strong products like a good wash basin or a cool faucet, your vanity will last longer. It will also look great. Many people like making their own vanity. It fits their space well and can have things like pull-out drawers, soft-close hinges, and floating shelves. You can make a neat, modern bathroom that looks how you want and works for you.
Pick strong materials that can handle water, like plywood, solid wood, or quartz. These will help your vanity last long and look nice.
Measure your bathroom space with care. Plan the vanity size and shape so it fits well and gives you enough storage.
Use the right tools for the job. Follow each step to cut, put together, and support the vanity frame. This will make it strong for a long time.
Add new features like soft-close drawers, floating styles, and good hardware. These make your vanity work well and look fancy.
Finish your vanity by sanding it smooth. Use water-resistant paint and install the countertop the right way. This will protect your vanity and keep it looking new.
When you start building your modern bathroom vanity, picking the right materials makes a big difference. Here are some top choices you should consider:
Plywood: Strong, moisture-resistant, and gives a smooth finish. Many experts say plywood is the best for vanity cabinets.
Solid wood: Looks beautiful and lasts a long time. You need to seal it well so it can handle bathroom moisture.
MDF (Medium Density Fiberboard): Smooth and budget-friendly. Works well if you seal it to keep out water.
Quartz or granite: Great for countertops. Quartz is easy to clean and stands up to water. Granite has unique patterns and resists heat.
Stainless steel or brass hardware: These metals do not rust easily, so your handles and hinges stay looking new.
Rubberwood: Eco-friendly and strong. Handles moisture and temperature changes well.
Tip: If you want a one-stop solution for bathroom products, check out Foshan Contop Bathroom Co., Ltd. They offer Watermark-certified vanities, tapware, and wash basins that work perfectly for modern bathroom projects.
You do not need a huge workshop to build a modern bathroom vanity, but having the right tools helps you get a professional result. Here is a handy list:
Track saw or circular saw (with guide) – for straight cuts on plywood.
Table saw – for sizing and shaping parts.
Miter saw – for cutting pieces to length.
Router – for shaping edges.
Jigsaw – for cutting out the sink opening.
Pocket hole jig – for strong, hidden joints.
Clamps – to hold everything tight while glue dries.
Pin nailer – for attaching thin trim.
Sharp chisel – for cleaning up edges.
You can swap some tools for more basic versions if needed. The key is to measure carefully and work safely.
Want to make your vanity stand out? Try adding some modern features:
Frameless design for a sleek look
Soft-close drawers and doors
Floating (wall-mounted) style
Integrated sinks
Stone countertops
LED-backlit mirrors or smart mirrors
Drawer organizers for better storage
Brushed metal hardware
These upgrades give your modern bathroom vanity a high-end feel and make daily routines easier.
You want your modern bathroom vanity to fit perfectly. Start by measuring your space. Check the width, depth, and height. Most vanities stand about 34 to 36 inches tall. This height feels comfortable for most people. Make sure you leave enough room to open doors and drawers. Always plan for plumbing. The drain pipe usually sits in the center, with hot and cold water lines about 4 inches to each side. Leave at least 21 inches in front of the vanity so you can move around easily.
Tip: Double-check your measurements before you buy materials. This helps you avoid mistakes and saves time.
Vanity Type | Depth (inches) | Width (inches) | Height (inches) |
|---|---|---|---|
Standard | 20 - 23 | 24 - 60 | 34 - 36 |
Compact | 16 - 18 | 12 - 24 | 32 - 34 |
Floating | 18 - 21 | 24 - 48 | 34 |
A modern bathroom vanity should give you plenty of storage without looking crowded. Use deep drawers for towels and toiletries. Add adjustable shelves for bigger items. Floating vanities make your bathroom look bigger and give you more floor space. Try drawer dividers or pull-out organizers to keep things neat. Over-the-toilet cabinets and wall-mounted shelves add even more storage. Good lighting, like LED mirrors, helps you see everything clearly.
Use stackable bins under the sink for extra space.
Medicine cabinets with sliding mirrors hide small items.
Wall hooks keep towels and robes off the floor.
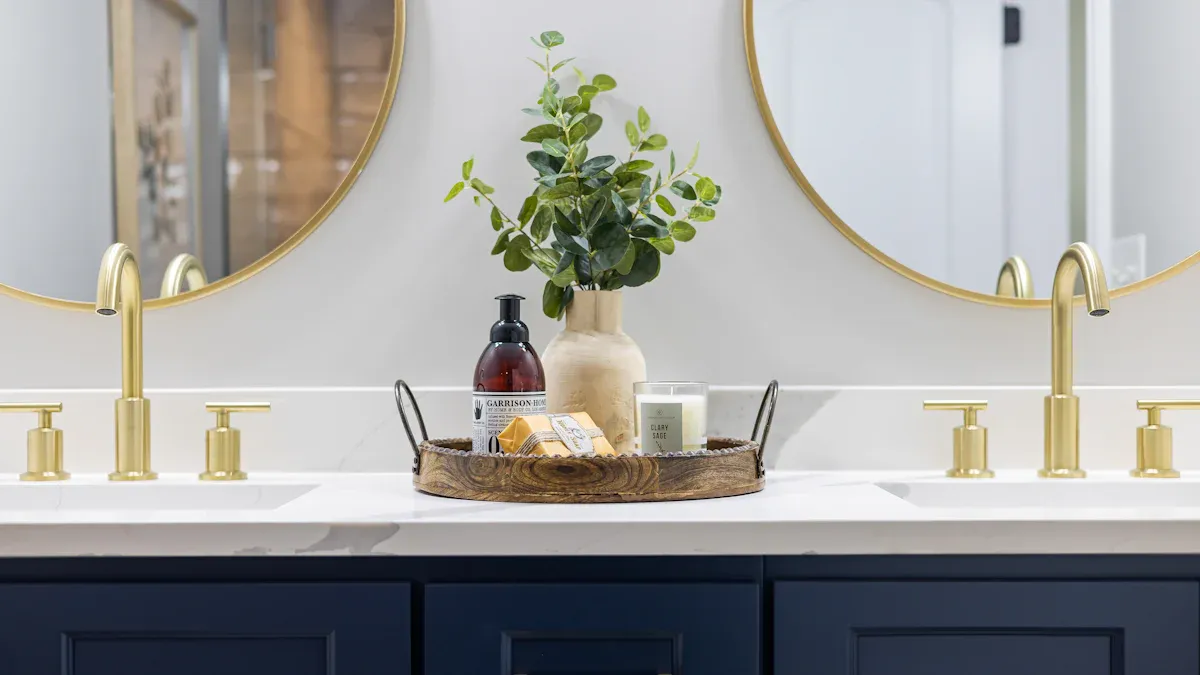
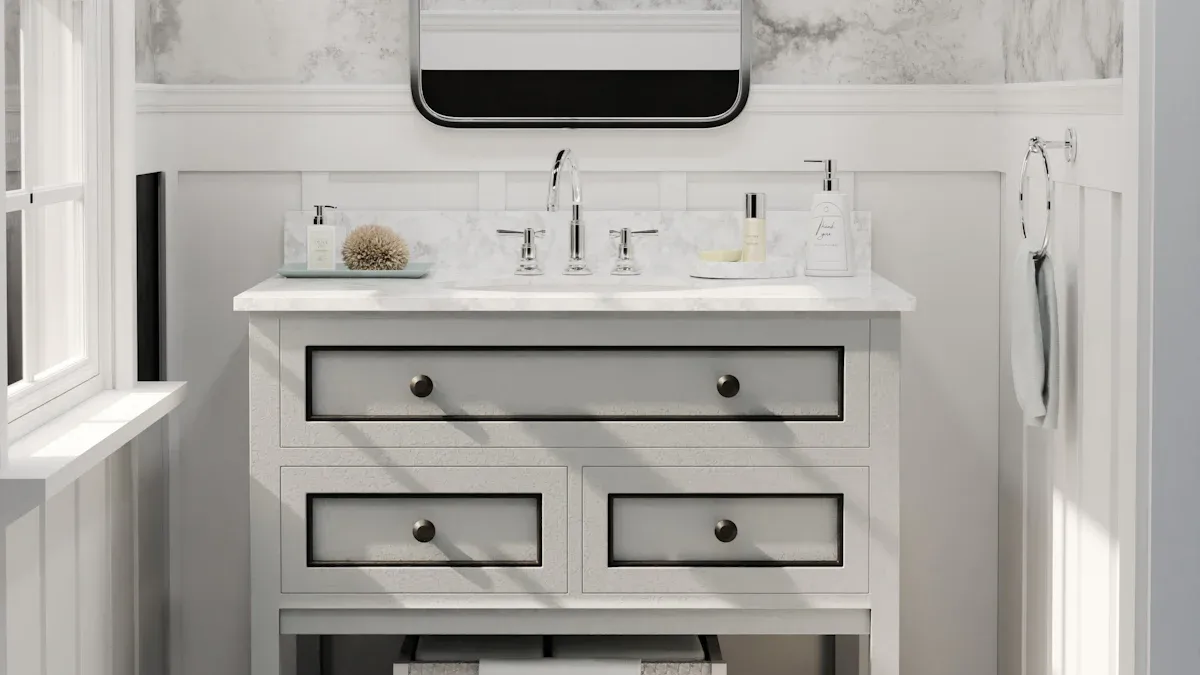
Modern bathroom vanities focus on clean lines and simple shapes. You will see flat surfaces, no fancy details, and straight edges. Popular colors include white, gray, navy blue, and natural wood. Matte black or gold hardware adds a stylish touch. Floating vanities and slim cabinets create a fresh, open feel. Many people choose stone or acrylic countertops for a sleek look. Pair your vanity with a matching wash basin or faucet for a complete design.
Floating vanities and neutral colors make your bathroom feel calm and modern.
Two-tone finishes and metallic hardware add personality.
Choose materials that resist water, like quartz or treated wood, for long-lasting beauty.
Building the frame is where your modern bathroom vanity starts to take shape. This step gives your vanity its strength and helps it last for years, even in a busy bathroom. Let’s break down the process so you can get a sturdy, professional result.
Start by laying out all your plywood and hardwood pieces. Use a flat, stable surface like a workbench or a piece of rigid foam on the floor. This keeps your cuts clean and safe. Measure each part twice before you cut. Mark your lines with a pencil and a straightedge. If you want the wood grain to look nice on the outside, plan your cuts so the best parts of the plywood show on the front and sides.
A track saw or circular saw with a guide helps you make straight, accurate cuts. Stack pieces like the two side panels and cut them together. This way, both sides match perfectly. For shelves and drawer fronts, leave them a little bigger than needed. You can trim them to the exact size after you put the frame together. Use a drill bit as a spacer if you want to make repeat cuts without measuring every time.
Don’t forget to cut out the opening for your wash basin. A jigsaw works well for this. Always check the depth of your saw blade so you don’t cut too deep and damage your work surface. If you want a smooth edge, use edge banding on the front of your plywood. Apply it slowly and trim it with a sharp tool.
Tip: Before you start assembly, dry-fit all your parts. Lay them out and make sure everything lines up. This helps you spot mistakes early.
Now it’s time to put the frame together. Start by attaching the two side panels to the bottom panel. Use wood glue and pocket screws for strong joints. Pre-drill your holes to keep the wood from splitting. Clamp the pieces together and check that everything is square with a speed square.
Add the back panel next. This keeps the frame sturdy and helps it stay square. If you’re building a face frame, attach it to the front using wood glue and pocket screws. Sand the joints smooth for a clean look.
Set the vanity in place and use a level to make sure it sits straight. If your floor isn’t even, slide shims under the frame until it’s level. Mark the wall where the vanity touches. Secure the frame to the wall studs with heavy-duty screws and brackets. This step is important for safety, especially if you plan to add a heavy quartz countertop or a large faucet.
For extra strength, use blocking between the wall studs behind the vanity. This gives you a solid anchor point. Test the frame by gently shaking it. Tighten any screws if you feel movement.
Note: A water-resistant finish like conversion varnish or oil-based polyurethane protects your bathroom vanity frame from moisture. Apply several coats for the best results.
Strong supports and smart shelving make your modern bathroom vanity both sturdy and useful. Inside the frame, add support strips or blocks at the top. These help hold up the countertop and sink. Use pocket screws and wood glue to attach them.
If you’re building a floating vanity, install heavy-duty mounting brackets or backing boards. Secure them to the wall studs. For floor-standing vanities, adjustable legs help you level the cabinet on uneven floors.
Shelves give you more storage. Adjustable shelves let you change the space for tall bottles or baskets. Pull-out organizers and U-shaped drawers work well around plumbing and make it easy to reach your things. Full-extension slides and soft-close features add a touch of luxury.
Tall vanities can use vertical shelving to store towels and toiletries. If you want a custom look, try modular storage systems or built-in organizers. These options help you keep your bathroom neat and make the most of your space.
Tip: Always double-check your measurements for supports and shelves. Good planning means everything fits and works as it should.
A well-built frame is the backbone of your modern bathroom vanity. Take your time with each step. Use quality materials like moisture-resistant plywood and solid hardwood. Secure everything tightly, and your vanity will stand up to daily use for years. If you need reliable bathroom products, Foshan Contop Bathroom Co., Ltd. offers a wide range of vanities, wash basins, and faucet options to complete your project.
You want drawers that feel strong and open smoothly every time. Start with solid wood for the drawer boxes. Dovetail joints work best because they lock the corners together and last for years. Some people use doweled construction, which is also sturdy and cost-effective. For the slides, you have a few choices. Side-mount glides are easy to install and hold up well. Under-mount glides hide underneath the drawer and give a clean look. Full-extension slides let you pull the drawer out all the way, so you can reach everything inside. Soft-close systems stop drawers from slamming and help them last longer. If you want to make cleaning easier, look for drawers with integrated clip systems so you can remove them quickly.
Tip: Use a multi-layer polyurethane finish on your drawers. This protects the wood from bathroom moisture and keeps them looking new.
Getting your vanity doors to line up just right takes a little patience. Remove the doors before you install the vanity. This gives you more space to work. After you secure the vanity to the wall, put the doors back on. Use European soft-close hinges for a smooth, quiet close. Adjust the hinges so the doors open and close without rubbing. Keep the gap between doors even—about 1/8 to 3/16 inch looks best. Use a small spacer or measuring tool to help. If your floor is not level, add shims under the vanity until everything lines up.
Always check that the doors swing open fully.
Adjust the hinges if you see any sagging or uneven gaps.
The right hardware makes your vanity look modern and feel great to use. Round knobs give a soft touch, while sleek cabinet pulls add a stylish edge. Match the finish of your hardware with your faucet or wash basin for a unified look. Matte black, brushed nickel, or chrome finishes all work well in a modern space. Mixing metals can add a fun twist and make your bathroom stand out. Choose hardware that feels comfortable in your hand and stands up to daily use.
Note: Foshan Contop Bathroom Co., Ltd. offers a wide range of bathroom accessories and hardware to help you finish your project with a professional touch.
You want your modern bathroom vanity to look smooth and last a long time. Start by removing all doors, drawers, and hardware. Label each piece so you can put them back in the right place. Sand the wood with 220-grit sandpaper, always moving with the grain. This step removes rough spots and helps the paint stick. Clean away dust with a vacuum and a microfiber cloth. Use a liquid deglosser for extra clean surfaces.
Next, apply a bonding primer with a high-quality brush for the edges and a woven mini-roller for flat areas. Let the primer dry overnight. Lightly sand again, then wipe away dust. Paint with a cabinet-grade enamel, like a semi-gloss finish, for a hard, water-resistant surface. Use the same brush and roller method. Sand lightly between coats for a factory-smooth look. Two coats usually give the best result. You do not need a top coat if you use enamel paint. Wait a day or two before reinstalling the doors and hardware.
Tip: Avoid foam rollers. They can leave marks on your vanity.
Quartz countertops work great for a modern bathroom vanity. Quartz resists stains, scratches, and bacteria. You do not need to seal it, and cleaning is easy with just soap and water. Quartz comes in many colors, so you can match your style. It also costs less than granite in many cases.
When you install the countertop, measure and cut it to fit your vanity. Install the faucet and wash basin before setting the countertop in place. Use adhesive or silicone caulk on the cabinet edges. Press the countertop down firmly. Seal the edges with more caulk to keep water out. Reconnect the plumbing and check for leaks.
Sink Type | Benefits |
|---|---|
Undermount | Sleek look, easy to clean |
Integrated | Seamless, modern, no water seepage |
Vessel | Stylish, makes a bold statement |
Move your vanity into place. Remove drawers and doors to make it lighter. Mark the wall studs and outline the vanity on the wall. Drill holes for plumbing, making them a bit bigger than the pipes. Slide the vanity in, fit the pipes, and use a level to check if it sits flat. Add wooden shims if needed. Secure the vanity to the wall studs with screws.
Install the countertop and sink, then connect the faucet and drain. Turn on the water and check for leaks. Seal all edges with silicone to stop water from getting in. For a professional finish, use modern hardware and accessories from Foshan Contop Bathroom Co., Ltd. You can also explore their tapware and wash basin options for a complete bathroom upgrade.
Note: Always double-check plumbing connections to prevent water damage.
You did it! Building your own vanity takes planning, patience, and the right tools. If you run into trouble, try these quick fixes:
Level the base and countertop with shims if things look uneven.
Use sealant to stop water damage.
Pick sturdy, corrosion-resistant hardware for lasting style.
Plan storage with drawers and shelves to avoid clutter.
Need more help? You can find step-by-step guides, downloadable plans, and community support online. For quality materials like a wash basin or faucet, Foshan Contop Bathroom Co., Ltd. offers trusted options. Explore more bathroom ideas or reach out to a pro if you want extra support.
Wipe your vanity with a soft cloth and mild soap. Avoid harsh cleaners. Dry water spots quickly. Use a water-resistant finish. For extra shine, try bathroom accessories from Foshan Contop Bathroom Co., Ltd. They help keep your space organized and stylish.
Yes, you can! Measure the opening, set the basin, and seal the edges with silicone. Connect the plumbing. If you want a perfect fit, check out Contop’s range of bathroom wash basins and tapware for easy installation.
A compact vanity, about 16 to 18 inches deep and 24 inches wide, fits most small bathrooms. Floating vanities save floor space. You can also add wall-mounted shelves or a slim toilet from Foshan Contop Bathroom Co., Ltd. for a modern look.
You can visit Foshan Contop Bathroom Co., Ltd. online. They offer Watermark-certified vanities, tapware, toilets, and bathroom accessories. Their products work well for modern bathroom projects in Australia, New Zealand, and beyond.


