- All
- Product Name
- Product Keyword
- Product Model
- Product Summary
- Product Description
- Multi Field Search
Views: 0 Author: Site Editor Publish Time: 2025-08-05 Origin: Site


Choosing a r&t toilet cistern for your bathroom has many benefits. It is even better if you pick a Watermark-certified product. This certification is required for all plumbing fixtures in Australia and New Zealand. It shows that each product is safe and works well. When you pick Contop, you get Watermark-approved choices. These options are high quality and follow the rules. Many people like concealed cisterns because they save space. They also look modern and are easier to clean. You can install one by yourself. But if the setup is hard or you need to follow rules, you might need a licensed plumber.
Always use Watermark-certified parts. This keeps your bathroom safe. It also meets Australian and New Zealand rules.
Get ready by turning off the water. Take out the old cistern safely. Mark the wall before you start installing.
Put up the carrier frame and cistern with care. Make sure they are level. Make sure they fit the right way.
Connect the water supply tightly. Use washers and gaskets to stop leaks. Hire a licensed plumber if local rules say so.
Test the cistern for leaks. Check if it flushes well before you finish. This helps you avoid problems later.

Get your tools and parts before you start. This helps you work faster and stops delays.
You need these tools for a safe job:
Drill: Use this to make holes for the frame or cistern.
Screwdriver (Phillips and flathead): These help you tighten or loosen screws.
Adjustable wrench: This tool helps you tighten nuts and bolts.
Level: Make sure your cistern and frame are straight.
Tape measure: Use this to check distances and placement.
Pencil or marker: Mark spots for drilling and lining up.
Pipe cutter: You may need this to shorten supply lines.
Safety gloves and goggles: Protect your hands and eyes.
Bucket or towels: Use these to catch water from pipes.
Tip: Always wear safety gear when using power tools or plumbing parts.
You need these parts to install your r&t toilet cistern. Make sure all parts are Watermark-certified for Australia and New Zealand. Using parts without this can cause problems:
Plumbers in Australia must use Watermark-certified products.
Non-certified parts can cause extra costs or safety issues.
Plumbers may not install non-certified items, which is inconvenient.
Watermark certification keeps your bathroom safe and legal.
Here is a checklist of the main parts you need:
Part | Purpose |
|---|---|
R&T toilet cistern (Watermark-certified) | The tank holds and releases water for flushing. |
Carrier frame (for concealed cisterns) | Supports the cistern inside the wall for a modern look. |
Flush valve | Controls water flow during flushing. |
Fill valve | Refills the cistern after each flush. |
Mounting brackets and bolts | Hold the cistern and frame on the wall. |
Inlet and outlet pipes | Connect the cistern to water and the toilet bowl. |
Sealing washers and gaskets | Stop leaks at joints and connections. |
Wall anchors (for your wall type) | Hold the frame or cistern in place. |
Decorative flush plate or button | Lets you flush the toilet with a press. |
Instruction manual (from manufacturer) | Shows you the installation steps. |
Contop gives you Watermark-certified products that follow local rules. We have many bathroom products, like vanities and shower enclosures, to help you build a nice bathroom. You can see all our Watermark-approved items at Contop Bathroom Products.
Note: Always check that every part is Watermark-certified before you start. This keeps your bathroom safe and working well.
Before you install your new r&t toilet cistern, you need to prepare the area. Careful preparation helps you avoid problems and makes the installation smoother.
You must stop water flow to the toilet before you begin. Follow these steps:
Find the shutoff valve. Look for it near the bottom of the toilet tank, connected to the water supply tubing.
If you do not see a shutoff valve, you can turn off the main water supply for your home. You can also use a wooden board to hold the float lever up inside the tank to stop refilling.
Turn the shutoff valve clockwise until it stops. Do not force it if it feels stuck.
If the valve is rusty or hard to turn, spray a lubricant like WD-40. If it still does not move, call a plumber.
Flush the toilet. The tank should empty and not refill. If water continues to flow, lift the float lever to check.
Tip: Always double-check that the water supply is off before you start removing any parts.
You need to remove the old cistern safely. Use these steps and safety tips:
Plug the toilet drain after removal. This stops sewer gases and odors from entering your bathroom.
Use a toilet drain plug, a plastic bag with a rubber band, or another removable cover.
Turn off the water supply completely.
Flush the toilet and remove any leftover water with a sponge or baster.
Loosen screws or bolts to disconnect the tank from the bowl. Ask someone to help support the tank.
Remove the wax ring gently with a putty knife. Clean the area well.
Unscrew the flange or use a safe solvent if needed.
Wear thick gloves and non-slip shoes for protection.
Move the toilet with help to avoid injury. Pad the bottom with a soft cloth to protect your floor.
Clean the drain pipe and area after removal.
Note: Remember to remove the drain plug before you install the new cistern.
You need to mark the wall for the new installation. The wall type and thickness matter, especially for concealed cisterns. Solid brick walls need special mounting systems. Measure the wall thickness and check if it matches the cistern’s requirements. Mark the spots for the carrier frame and cistern using a pencil or marker. Make sure the mounting method suits your wall construction. This step helps you position the r&t toilet cistern securely and ensures the flush plate fits well.
Tip: Always check the installation instructions for your cistern model. The right wall type and thickness keep your installation stable and safe.
Installing your r&t toilet cistern takes careful steps. You need to make sure each part fits well and works safely. Follow these instructions to get the best results.
Start by mounting the carrier frame for your r&t toilet cistern. This frame supports the cistern inside the wall and keeps everything stable.
Confirm the spot for the cistern. Mark the finished floor level (FEL) on the wall. Use this as your baseline.
Build the mounting wall before you start brickwork. This gives you a strong base.
Drill holes in the wall where you want to place the iron brackets.
Install expansion screws into the holes. These hold the brackets tight.
Fix the iron brackets onto the expansion screws. Make sure they do not move.
Place the concealed cistern onto the iron brackets. Check that it sits flat and does not wobble.
Connect the flushing pipes and tubes. Adjust them to match your wall thickness.
Add installation accessories like plastic holders and piping stoppers. These protect the pipes and keep space for future work.
Tip: Use a spirit level to check that the frame is straight and vertical. This helps your r&t toilet cistern work well and look neat.
After you mount the frame, you need to secure the cistern. Proper alignment and fixing are important for safety and function.
Adjust the frame height and depth. Make sure it lines up with your plumbing connections.
Secure the frame to the floor and wall using anchor bolts. Tighten them so the frame does not move.
Attach the cistern to the frame. Follow the instructions from the manufacturer. Check that the water inlet and flush pipes line up.
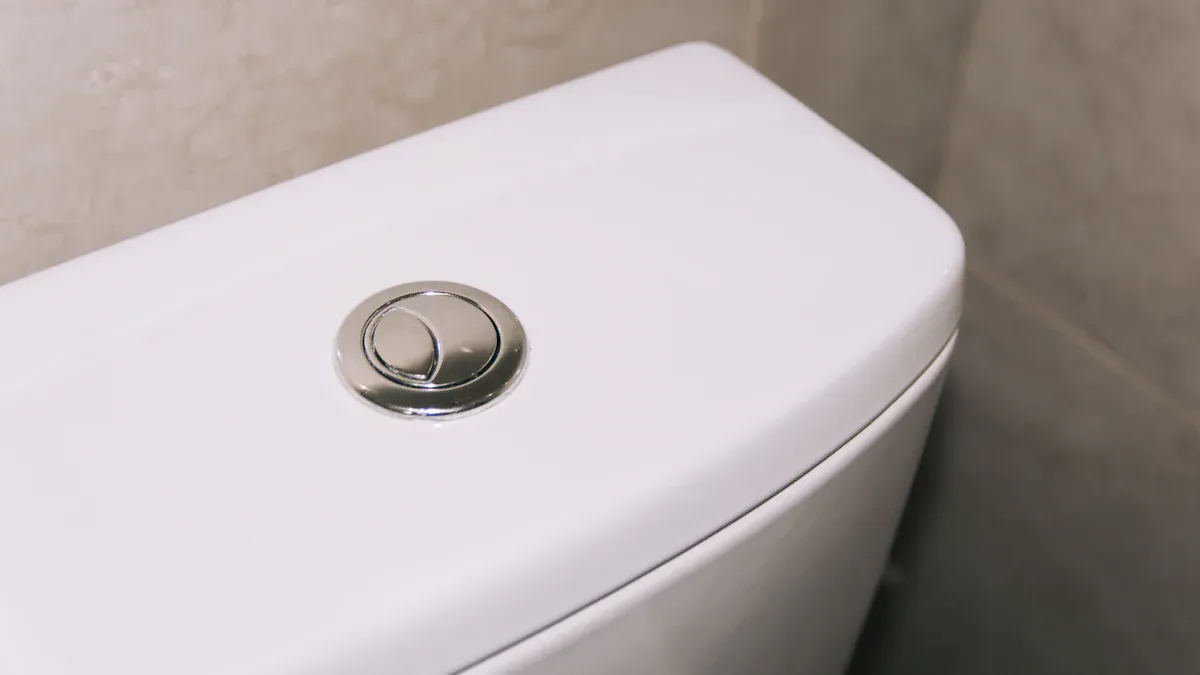
Align the flush plate bracket with the cistern mechanism. This ensures the flush button works every time.
Mount the toilet bowl onto the frame’s bolts. Make sure it sits level and does not wobble.
Tighten the nuts on the bolts. This keeps the bowl in place.
Note: Do not use silicone sealant on joints. Use the sealing washers and gaskets provided. These parts stop leaks and keep your r&t toilet cistern safe.
Now you need to connect the water supply to your r&t toilet cistern. This step lets your toilet flush and refill correctly.
Attach the inlet pipe to the fill valve. Make sure the connection is tight.
Use a wrench to secure the fittings. Do not over-tighten, as this can damage the threads.
Check that all washers and gaskets are in place. These prevent leaks.
Connect the outlet pipe to the toilet bowl. Make sure it lines up with the flush valve.
Double-check all connections. Look for gaps or loose fittings.
Alert: If your local rules require a licensed plumber, hire one for this step. Watermark certification is important for compliance in Australia and New Zealand. At Contop, I always recommend using Watermark-approved products for every installation. This keeps your bathroom safe and legal.
You have now installed your r&t toilet cistern. Each step helps you build a modern, reliable bathroom. If you need more Watermark-certified products, Contop offers a full range, including tapware, basins, and vanities. You can trust our products for quality and compliance.
You need to install the flush mechanism before you close up the wall or finish the installation. Start by placing the flush valve and fill valve inside the r&t toilet cistern. Make sure each valve sits in the correct spot and lines up with the openings. Attach the flush plate or button to the front of the cistern. Check that the button moves freely and activates the flush valve. Adjust the chain or rod connecting the button to the flush valve so the flush works with one press. If your model uses a handle, connect it to the flush valve and test its movement.
Tip: Always follow the manufacturer's instructions for your specific model. This helps you avoid mistakes and ensures smooth operation.
You must attach several accessories to complete the installation. Each part has a special job to keep your toilet working well and leak-free. Here is a table showing common accessories and their functions:
Accessory | Purpose/Function |
|---|---|
Wax Ring | Seals the connection between toilet and drainpipe to prevent leaks and odors. |
Tank-to-Bowl Bolts | Secure the tank to the bowl, ensuring stability and preventing leaks. |
Supply Line Connectors | Connect the water supply line to the toilet’s fill valve, ensuring watertight connection. |
Flush Valve | Controls the release of water from the tank to the bowl during flushing. |
Fill Valve | Regulates water flow into the tank after a flush, maintaining water level. |
Overflow Tube | Prevents tank overflow by directing excess water into the bowl. |
Flush Handle | Mechanism to initiate the flush by activating the flush valve. |
Check that each accessory fits tightly and sits in the right place. Tighten bolts and connectors, but do not over-tighten. This prevents cracks or damage.
Now you need to test your r&t toilet cistern for leaks and proper function. Follow these steps:
Fill the tank completely and turn off the water supply.
Mark the water level inside the tank.
Wait 30 minutes and check if the water level drops.
If the water drops, inspect the flapper or drain seat for wear.
Replace the flapper if needed, choosing the correct size for your model.
If you notice running water or weak flushing, try these troubleshooting tips:
Inspect the flapper valve for cracks or warping.
Use food coloring in the tank to check for leaks into the bowl.
Adjust the float to set the water level about an inch below the overflow tube.
Clean mineral build-up from jet holes and siphon tubes.
Tighten tank bolts carefully to stop water trickling.
Replace the wax ring if you see leaks at the base.
Note: Always check all connections and test the flush several times before closing the wall or finishing the bathroom. Fix any issues now to avoid bigger problems later.
You now know the main steps to put in an r&t toilet cistern. Always pick Watermark-certified products for safety and to follow Australian rules. Check every connection by tightening with your hands and the right tools. Test for leaks before you finish the job. This stops problems and keeps your bathroom working well. If you want good and legal sanitary ware, you can ask Contop for help. Sometimes, you might need a licensed plumber to follow all the rules.
Look at the label or the manual. You should find the Watermark logo there. This logo means your cistern follows the rules in Australia and New Zealand.
You can do it if you read the instructions and use the right tools. If your area needs a pro for Watermark rules, hire a licensed plumber.
Check all washers and gaskets for problems. Use a wrench to tighten any loose parts. Change any broken pieces. If it still leaks, call a plumber for help.
A concealed cistern helps save space and looks modern. It makes cleaning easier. You also hide the pipes for a tidy look.
You can get Watermark-certified items at Contop. Contop sells toilets, tapware, basins, and more. All their products are safe and meet local rules.


